 Smart Monitoring System
A smart home monitoring system combining computer vision, voice AI, Bluetooth radar and Gemini visual recognition. This manual walks you through the five modes and every feature, step by step.
Highlights
What sets this system apart from ordinary surveillance.
Hardware
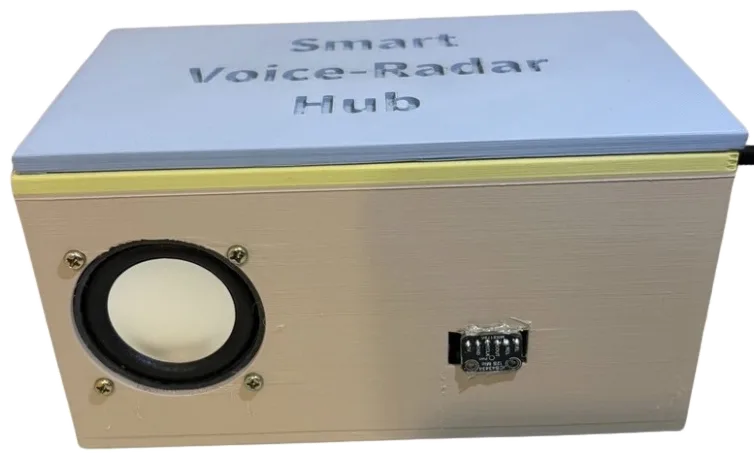
The system is made of two physical devices — a Bluetooth scanner for “finding things”, and a smart voice-radar hub for “listening and speaking”.
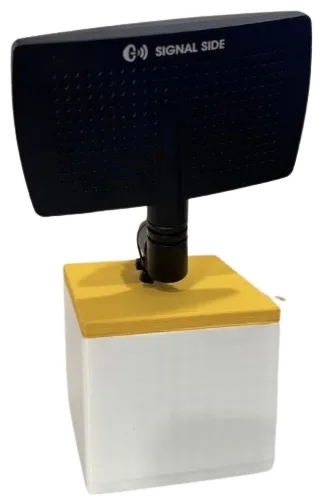
How the two devices reach the system
Both devices talk to the system over your home Wi-Fi. They are optional — every mode works from the browser alone; the hardware adds radar search and spoken replies.
- Power up both devices and put them on the same Wi-Fi network as the computer running the console.
- The scanner reports Bluetooth signal strength to the console, which turns it into the direction and distance shown in “Find Items”.
- The hub carries the voice assistant’s microphone and speaker, so radar results and alerts are read out loud in the room instead of only on screen.
Architecture
How data flows: sensor input → real-time AI in the browser → multiple outputs.
Quick Start
Up and running in three minutes: open the site, allow the camera, pick a mode, press Start.
Signing in
The system requires an account. A sign-in screen appears the first time you open it — you can register yourself, no application needed.
- No account yet: tap “Register” under the sign-in box, choose a username and password, then press “Register & Log In” — you go straight into the system.
- Already have an account: enter your username and password and press “Log In”.
- After signing in it asks where to save event clips. Pick a folder on this computer, or press “Skip for now” and set it later under Settings → System → Storage.
Getting started
- Open the system URL in a browser on your computer or phone and sign in as described above.
- Wait for the recognition models to load (bottom-right). The first time downloads the models; afterwards they’re cached.
- When the browser asks, click “Allow” to enable the camera.
- Pick the mode you want from the mode bar at the top.
- After setting the left-column options, press Start to begin monitoring.
Three main areas
1 Find Items Mode
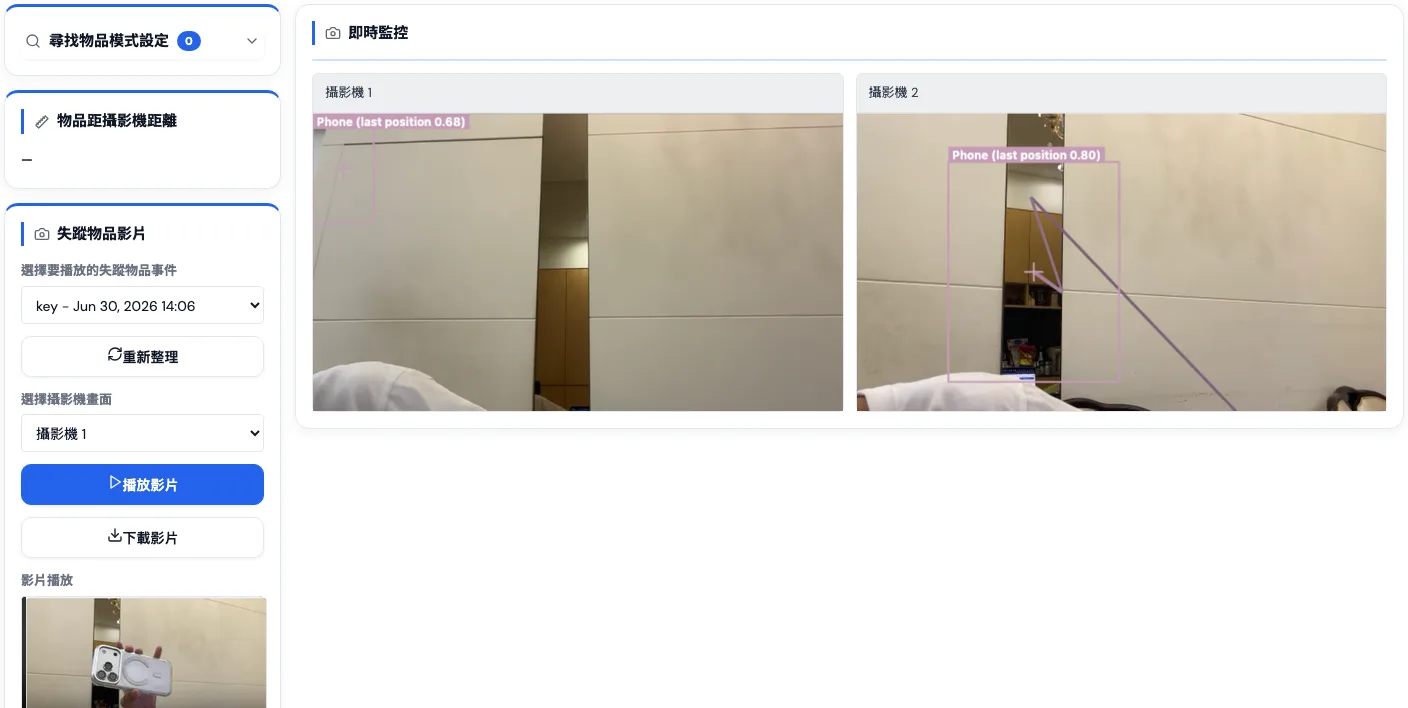
Choose items to track; when one disappears from view, the system auto-records the “5 seconds before it vanished” so you can replay and find it.
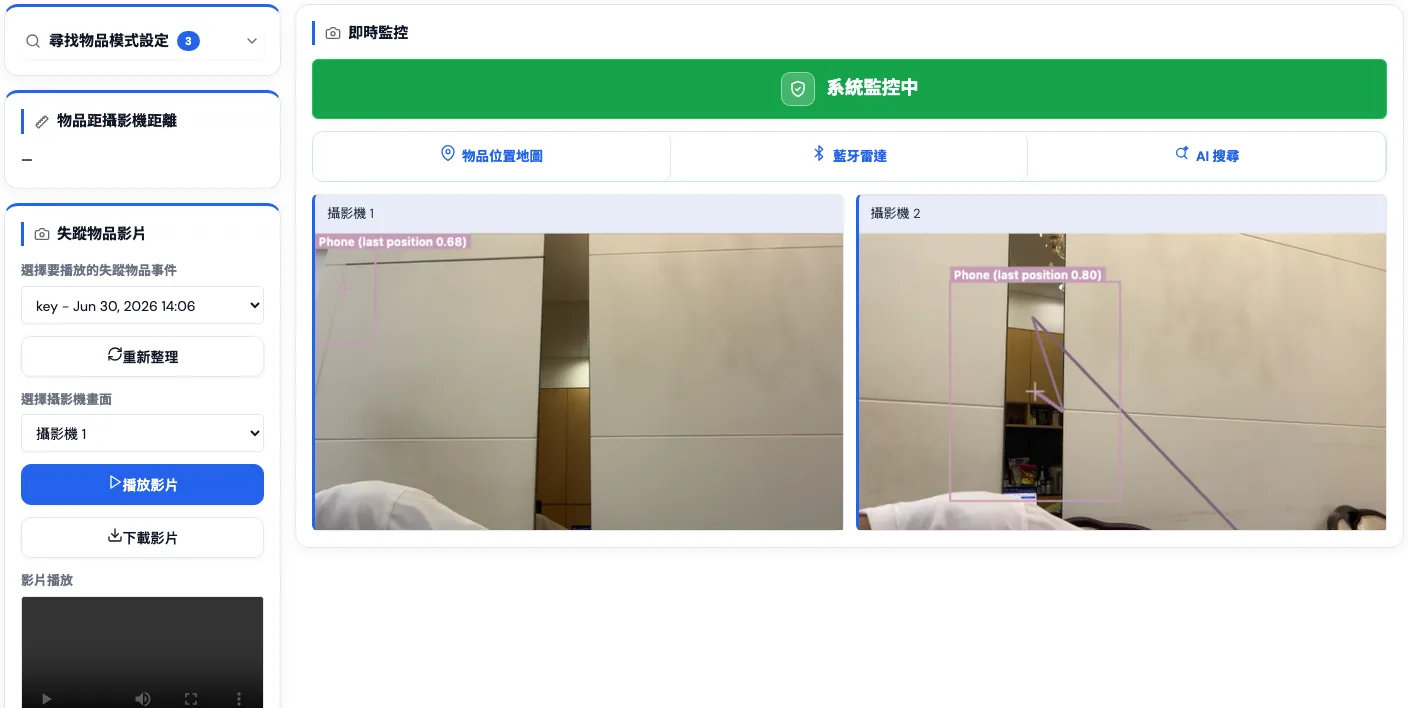
Steps
- Click “ Find Items” at the top.
- Tick the items to track in the left-column item list (e.g. keys, phone, wallet).
- Press Start; the center view boxes the selected items in real time.
- When an item leaves the frame, a clip is auto-created under “Disappearance Clips” on the right.
Disappearance Clips
Replay the clips auto-recorded when an item disappears.
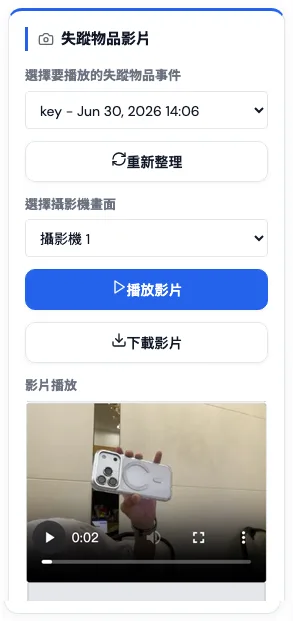
- Pick the clip to replay from the dropdown (named “item – time”).
- Choose the camera angle to view.
- Press Play; unwanted clips can be deleted.
Advanced features
2 Leaving-Home Reminder
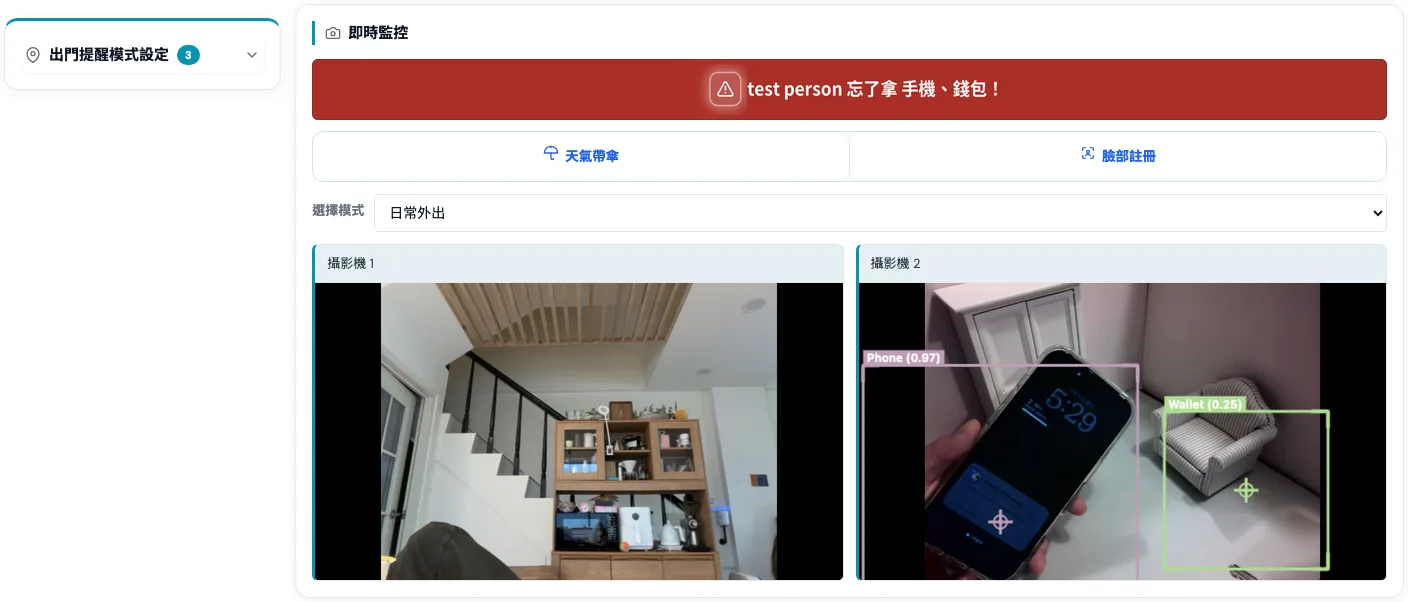
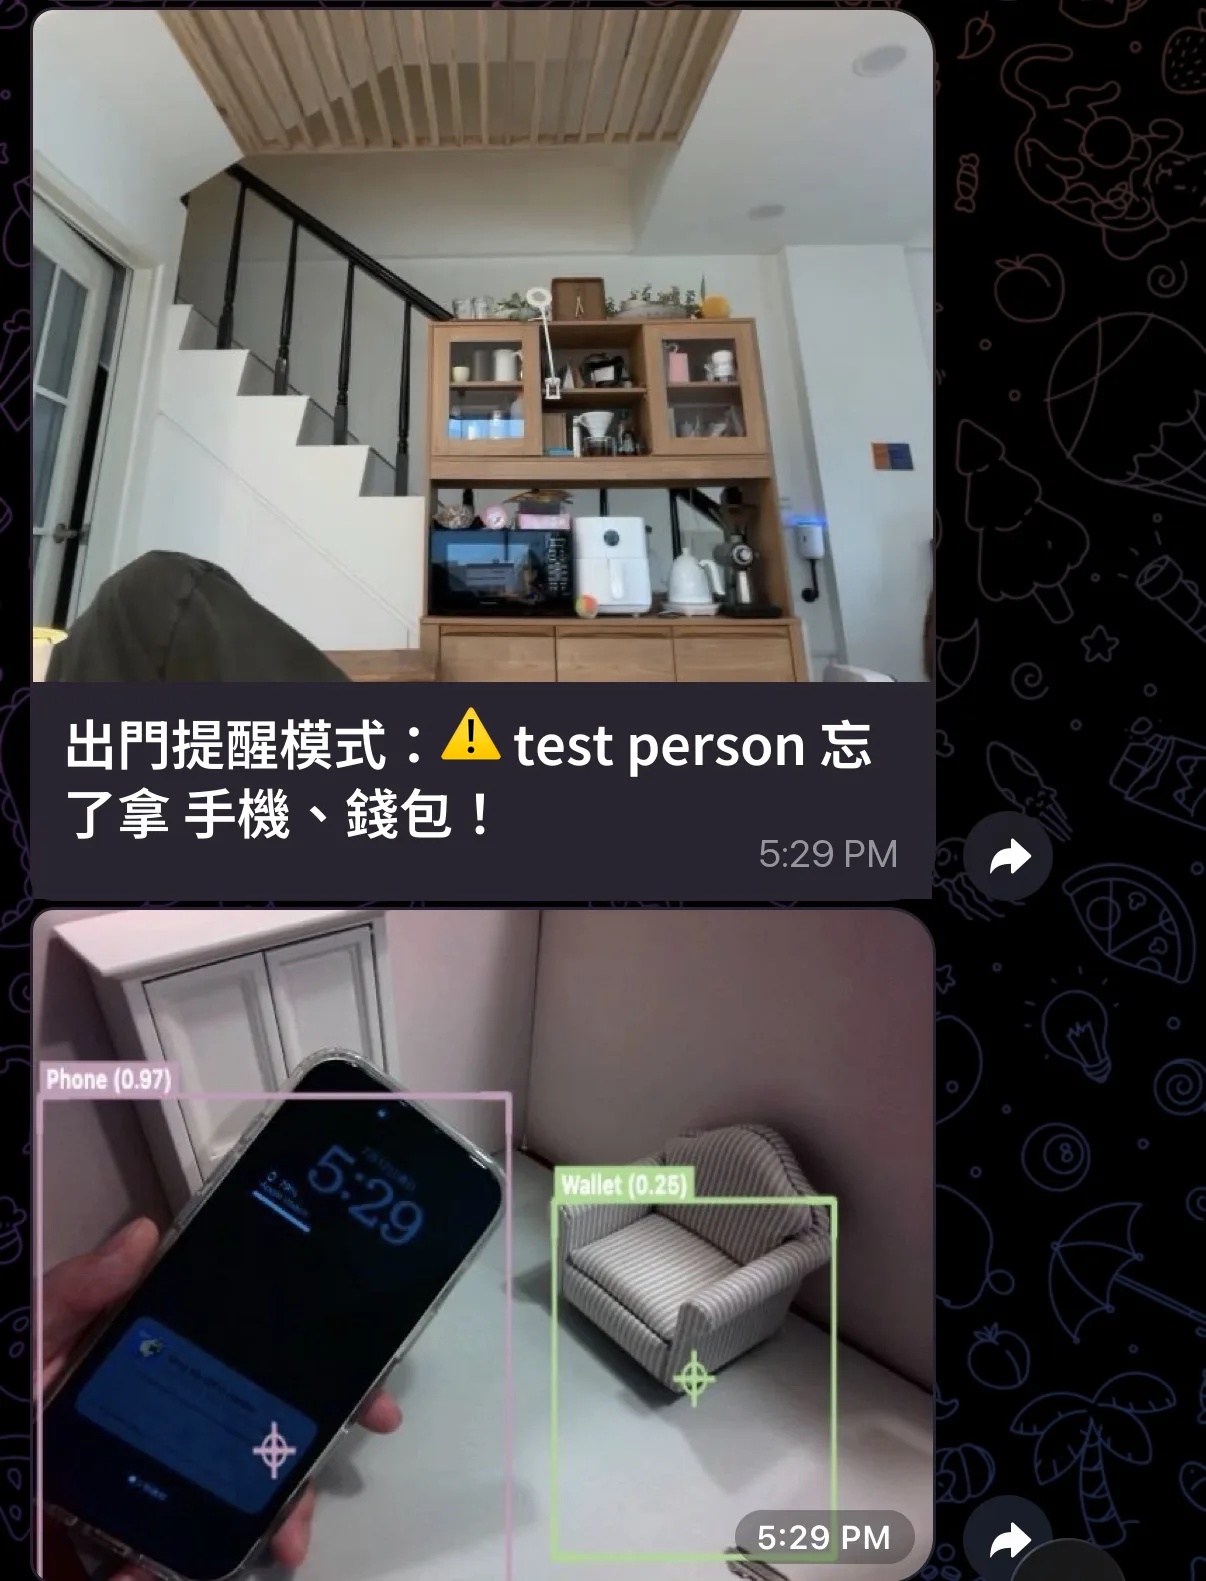
When a registered face is recognized, it reminds the person “what they forgot to take”, and can check the weather to decide on an umbrella.
Steps
- First register family faces under “ Face Registration” on the right (see section 9).
- Tick the must-take items for going out (keys, wallet, phone, umbrella…).
- Select your city to get weather information.
- Press Start. The reminder fires only when a registered face leaves the frame while a must-take item is still there — it won’t nag while you’re home.
3 Cabinet Alert Mode
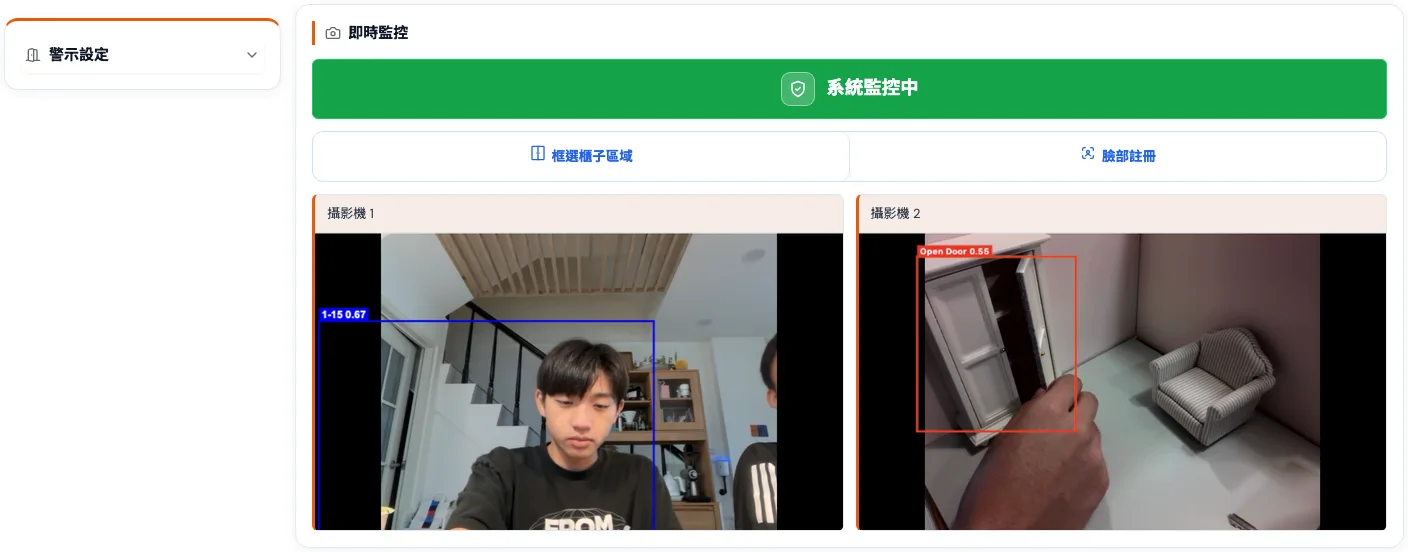
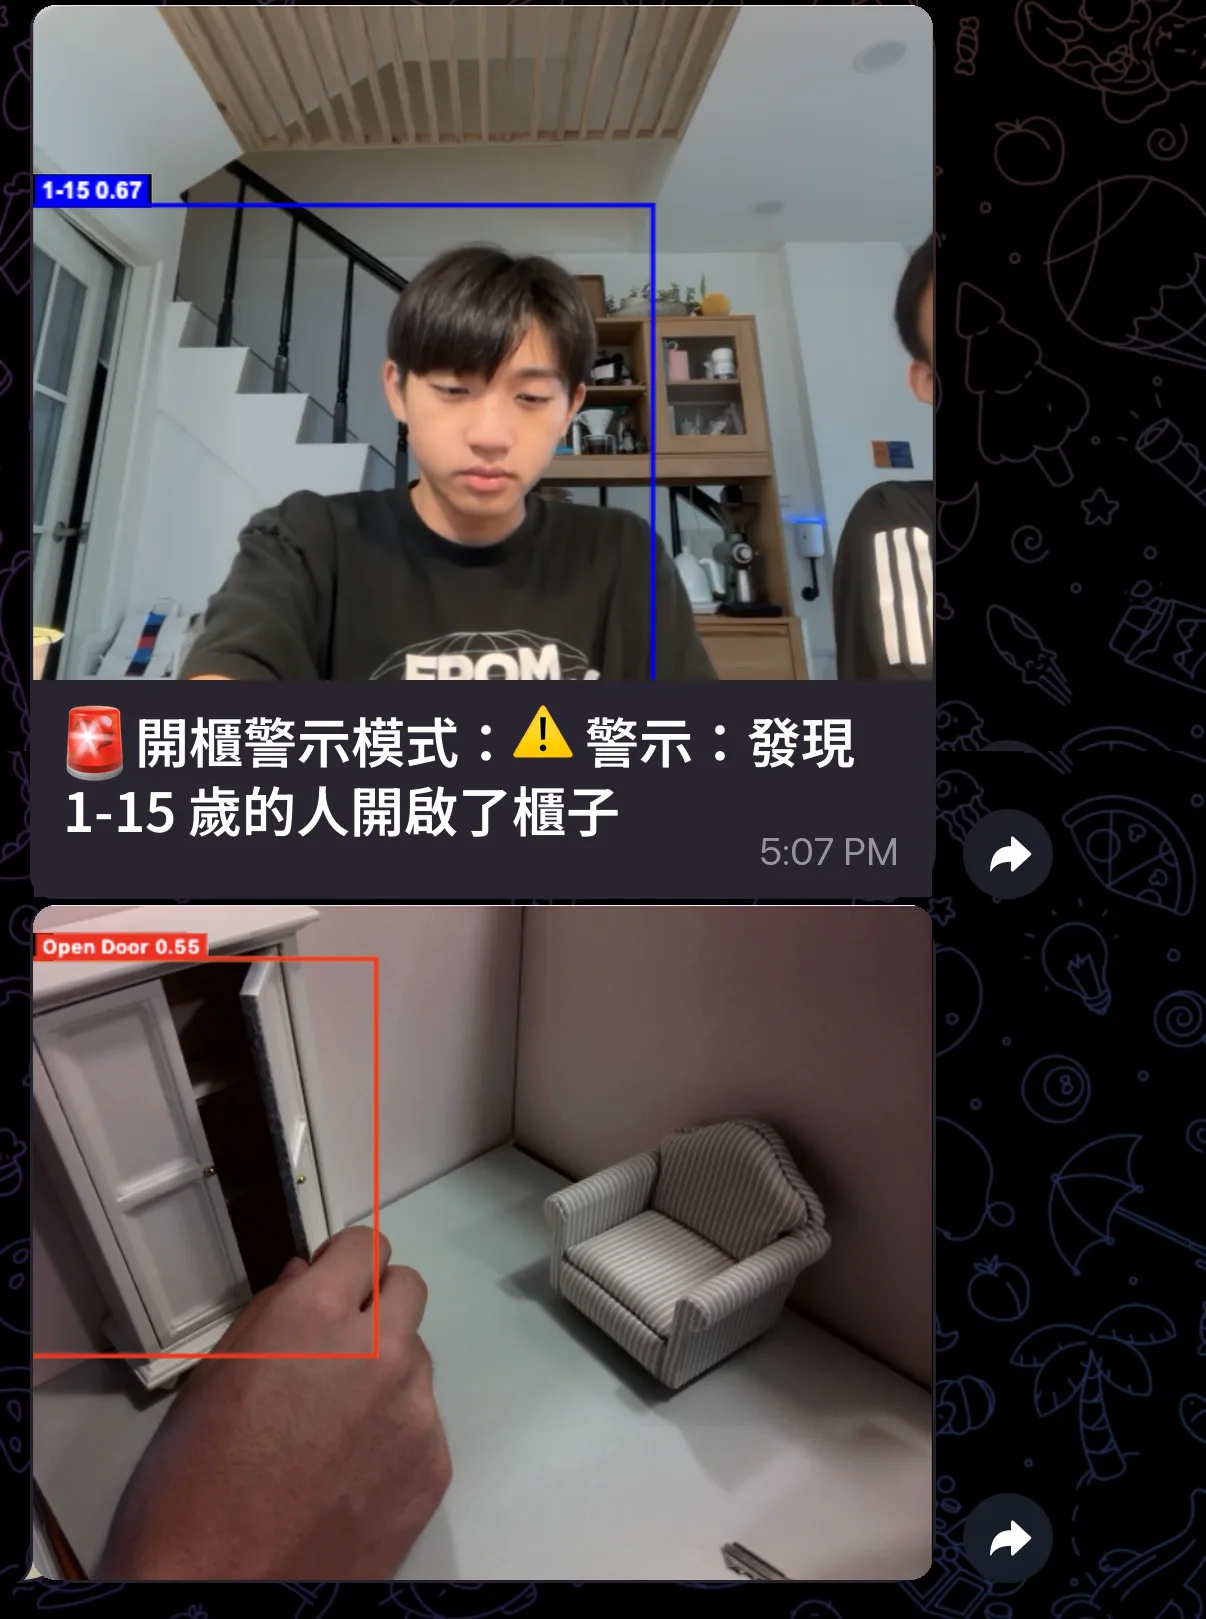
Monitors cabinet doors and judges violations by “age” or “face” rules (e.g. children may not open the medicine cabinet).
Steps
- Click “ Cabinet Alert” at the top.
- Click “Capture current frame” to grab a still from the camera.
- Click two opposite corners on the image to box the cabinet area to monitor.
- Set the opening rule: an allowed age range, or specific faces.
- Press Start. If the door is opened against the rule, it raises a red alert at once and auto-captures the moment.
4 Security Monitor Mode
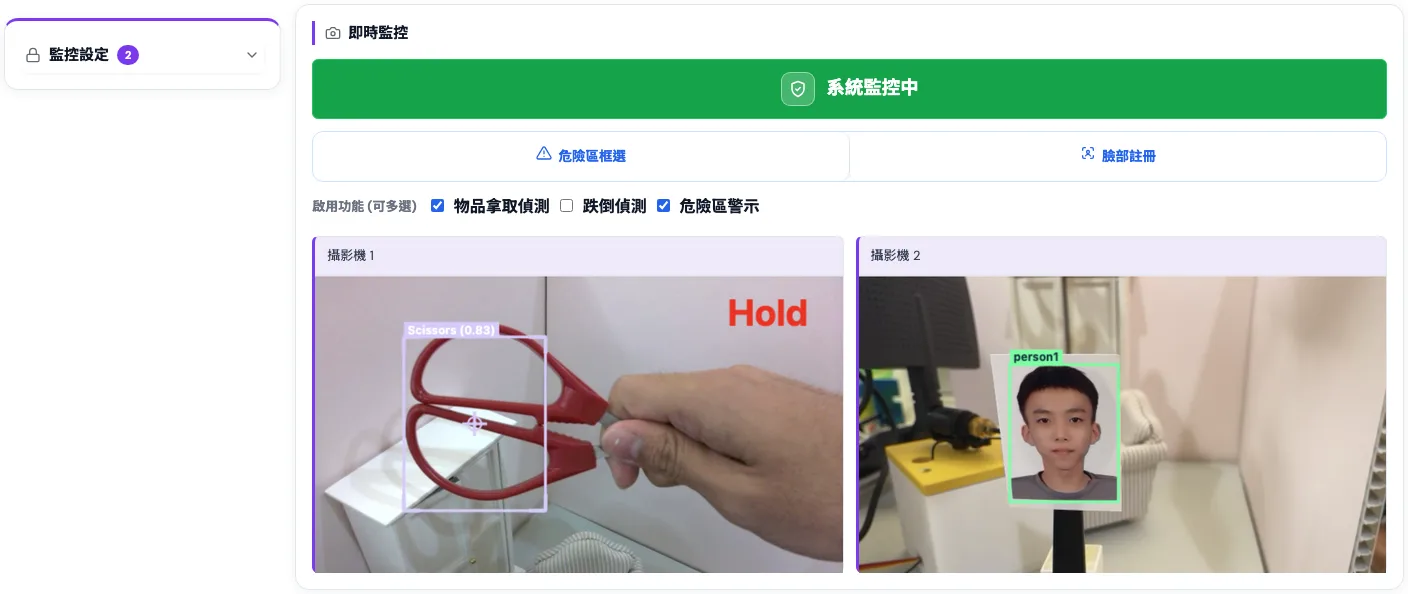
Protect chosen items against grabbing, detect falls, and frame a child/pet danger zone that alerts when a person or pet enters and stays.
Steps
- Click “ Security Monitor” at the top.
- Tick the items to protect.
- Tick the features to enable: grab detection, fall detection, danger-zone alert.
- (Optional) Set identity rules: an alert fires only when someone outside the allowed ages / faces makes a grab gesture.
- (Optional) After ticking “Danger Zone Alert”, press “Danger Zone”, capture the frame and click two corners to mark the area; limit targets to people / pets or “young children (age 1–15)”, and set the dwell time.
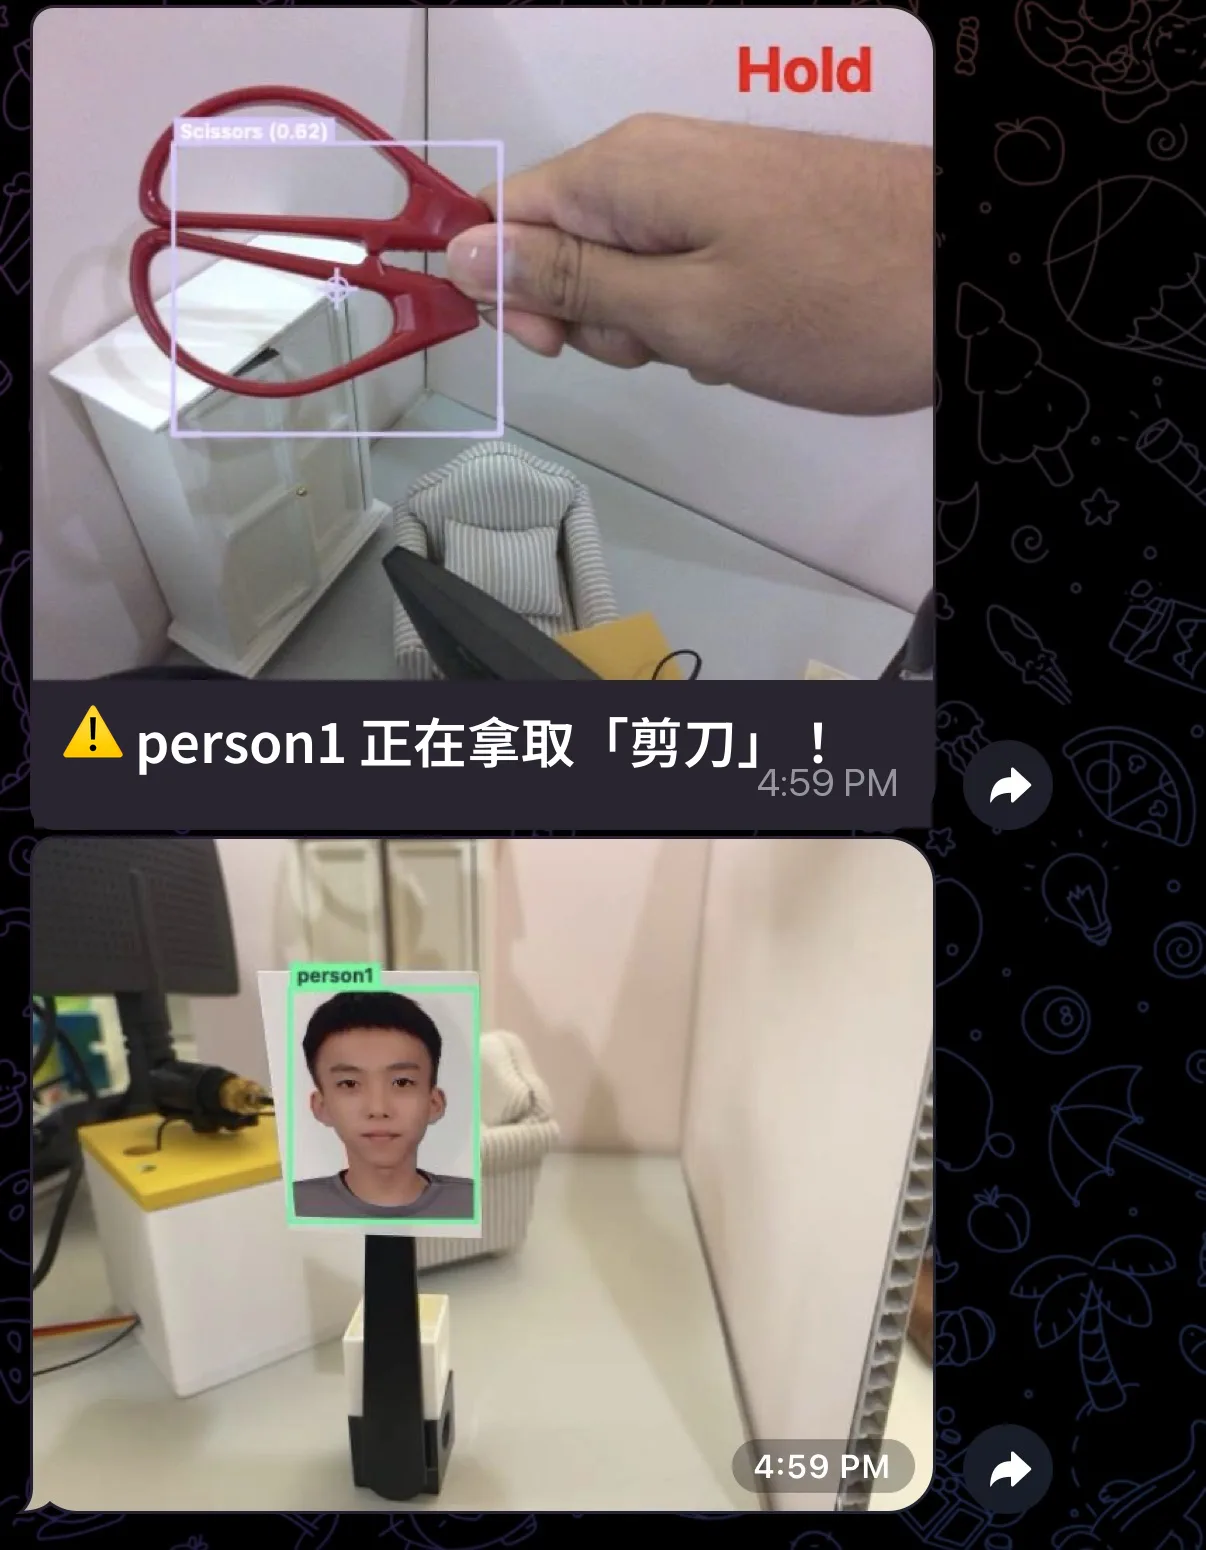
- Press Start. An alert fires when a protected item is grabbed, a fall is detected, or a target enters and stays in the danger zone.
5 Smart Assistant Mode
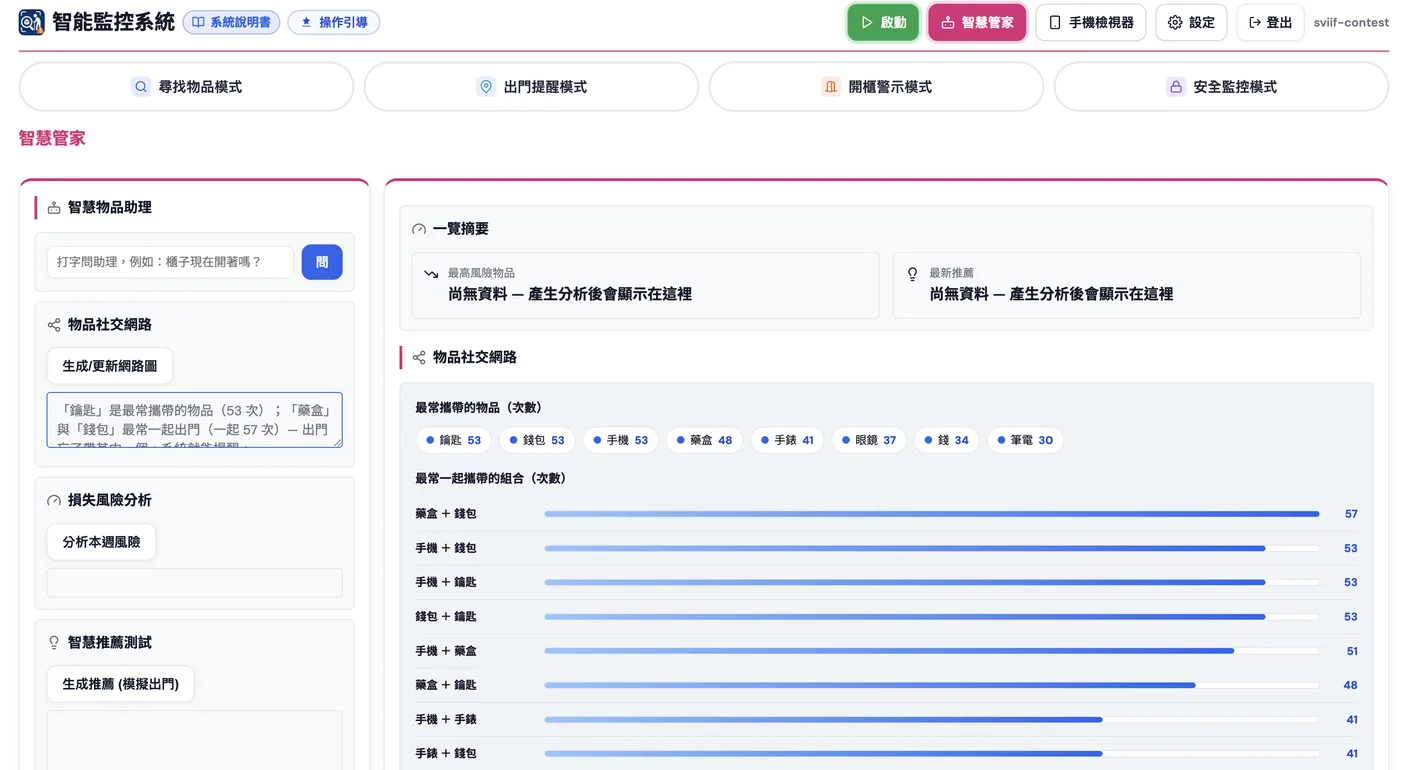
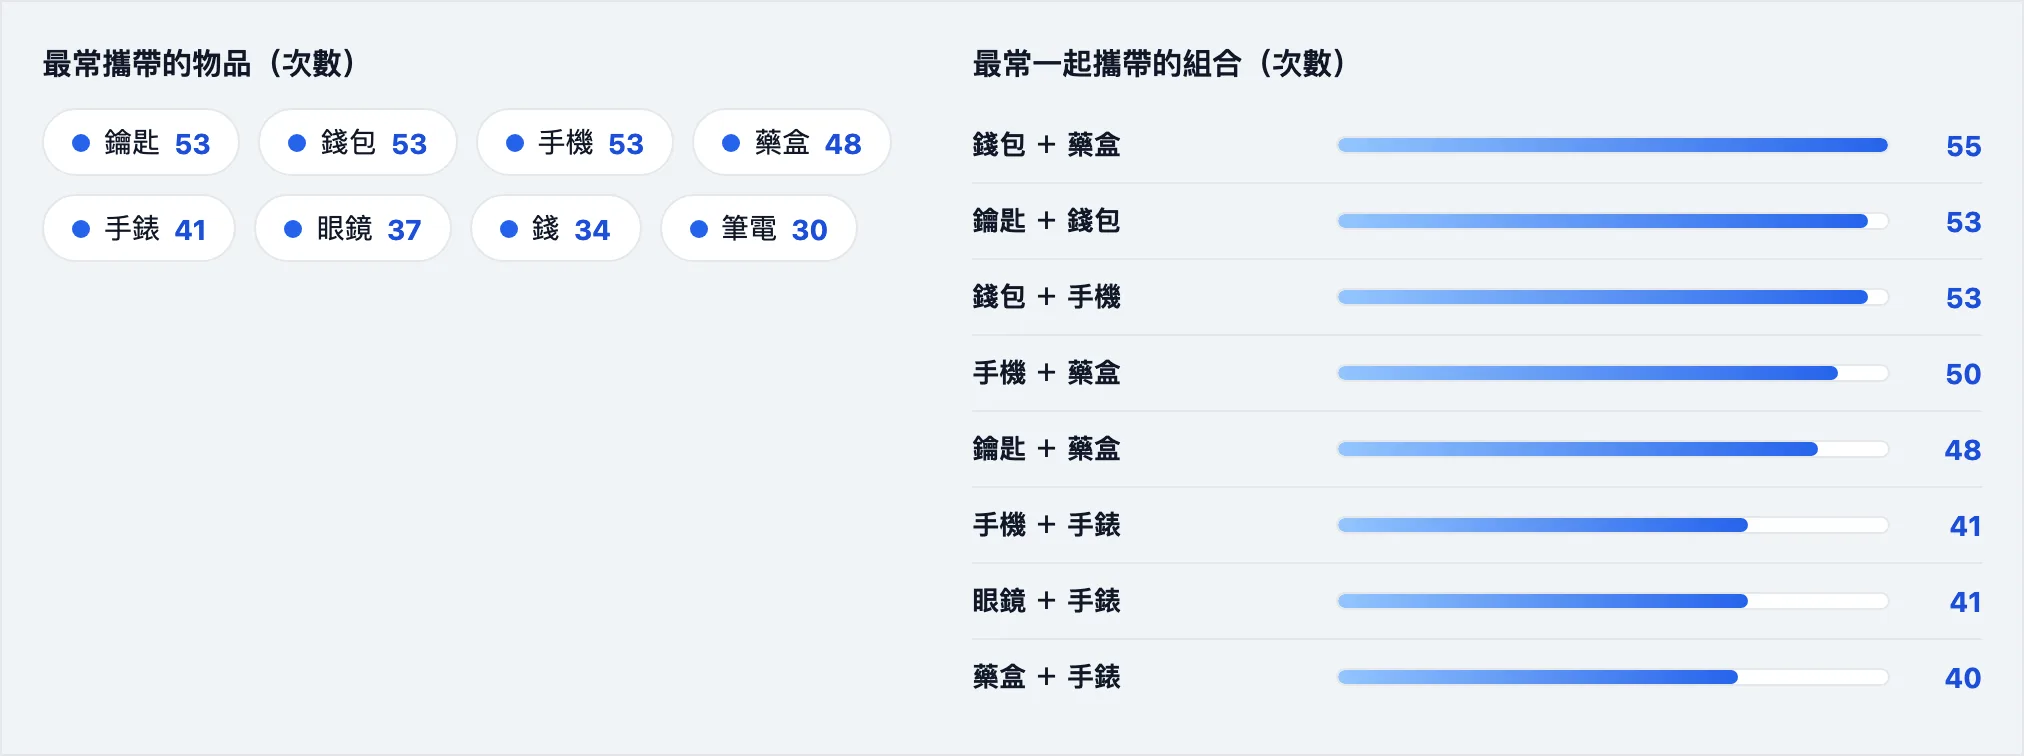
Analyzes your carrying habits and offers a social-network graph, loss-risk prediction, carry recommendations and item-location lookup.
6 Live Monitoring
The center camera feed with all recognition results overlaid.
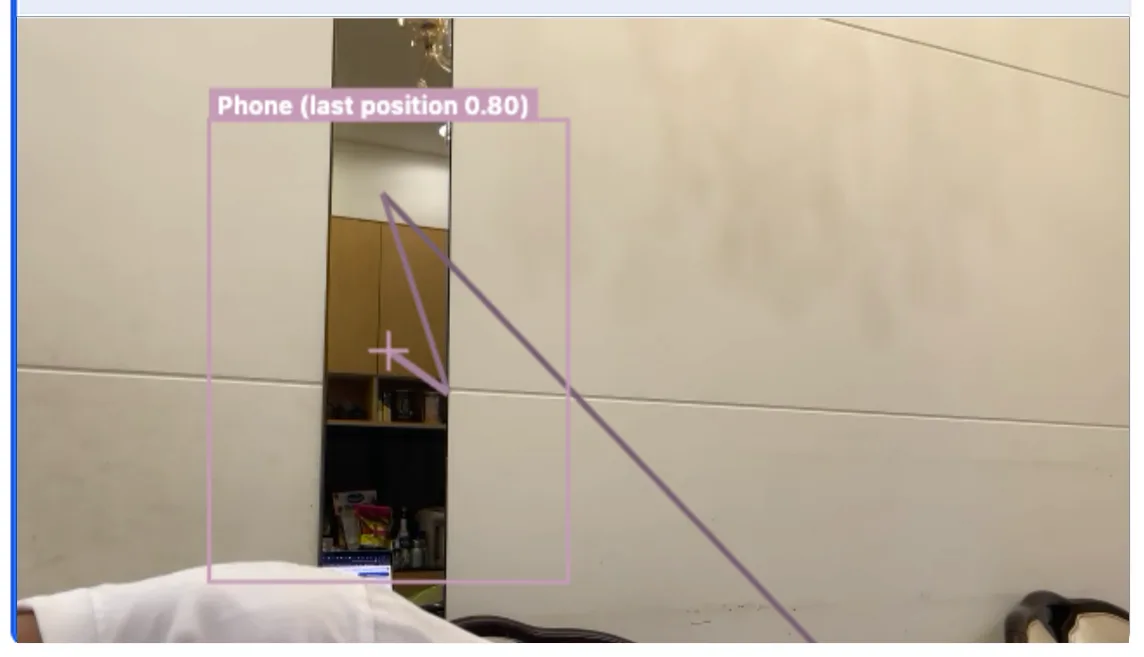
- Detection boxes: only your selected items are boxed, labeled with name and confidence.
- Motion trail: each item’s path is drawn on screen and stays visible, so you can trace where it went.
- Dual cameras: if a second camera is connected, both show side by side.
- Status bar: shows the current state (monitoring / alert).
7 Alerts
Lists the alerts the system raises in real time, color-coded by level.
| Info | General notices, e.g. “all items present”, “cabinet opened”. |
|---|---|
| Warning | Worth attention, e.g. “item disappeared”, “a hand is near a protected item”. |
| Danger | Needs immediate action, e.g. “cabinet violation”, “fall detected”, “danger-zone intrusion”. |
Alert text follows your chosen language; the list can be cleared at any time.
Alert Log
The alerts area keeps a log of recent alerts, one row each as “time + colored dot + message” — as easy to read as a phone's notification list, so you can review what happened without opening anything. The log is stored in this device's browser.
History Center
Tap “🕑 History” at the bottom-right to open a full alert timeline: each alert carries a snapshot thumbnail, and you can filter by mode (Leaving-Home / Cabinet Alert / Security Monitoring), search by keyword, or export CSV in one tap. History is kept per account on the local device.
8 Settings — Registration
Register faces and items for identity checks used by Leaving-Home, Cabinet and Security modes.
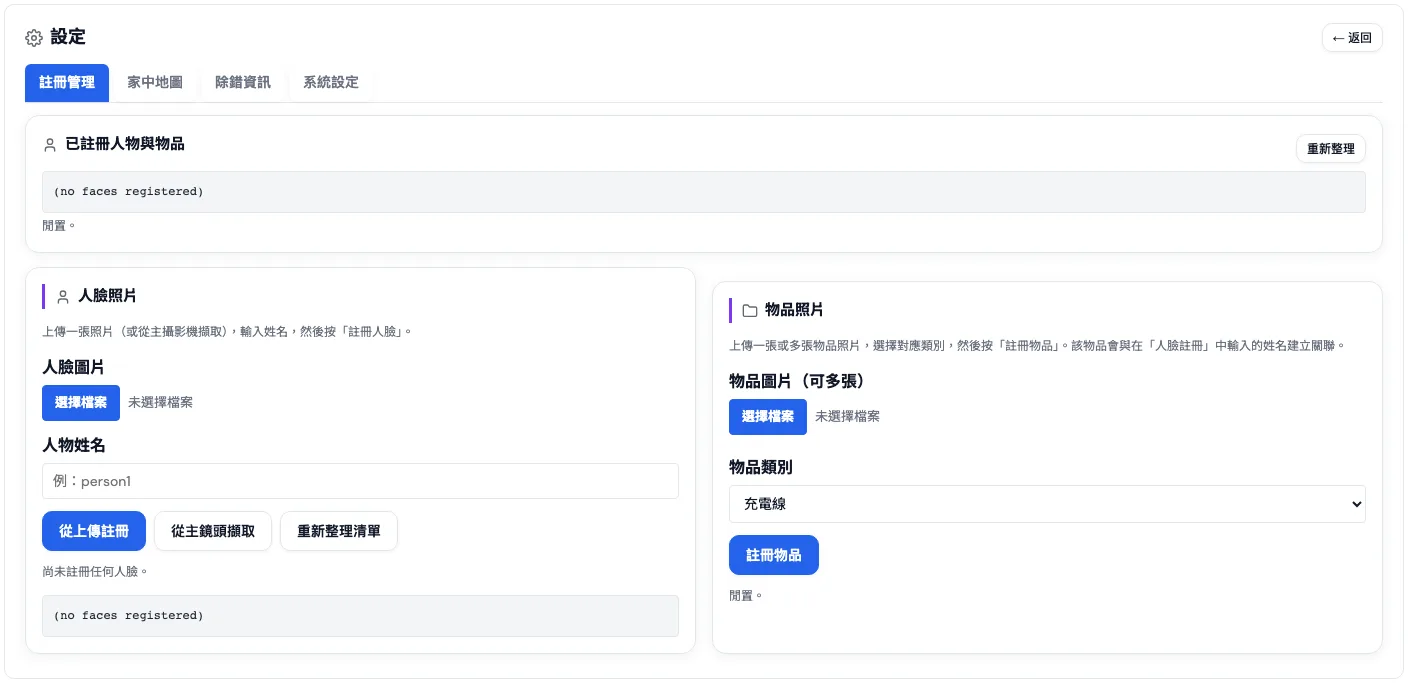
Face Registration
- Upload a photo, or take one live from the main camera.
- Enter the name.
- Click “Register Face”.
Item Registration
- Upload one or more photos of the item.
- Choose the matching item category.
- Click “Register Item” (it links to the name entered in face registration).
Home map
Settings → Home map lets you sketch your floor plan and pin each item where it belongs (keys by the entrance, pillbox on the dining table). One set of pins feeds two features.
- Item map: open it from the Item Search toolbar to see where each item was last seen, and which camera is nearby.
- Misplaced alert: warns you when an item sits somewhere it does not belong. It judges by these pins, so items you never pinned never trigger it.
9 Settings — System
Adjust detection source, audio, time zone, language, appearance, cameras, account and video save location.
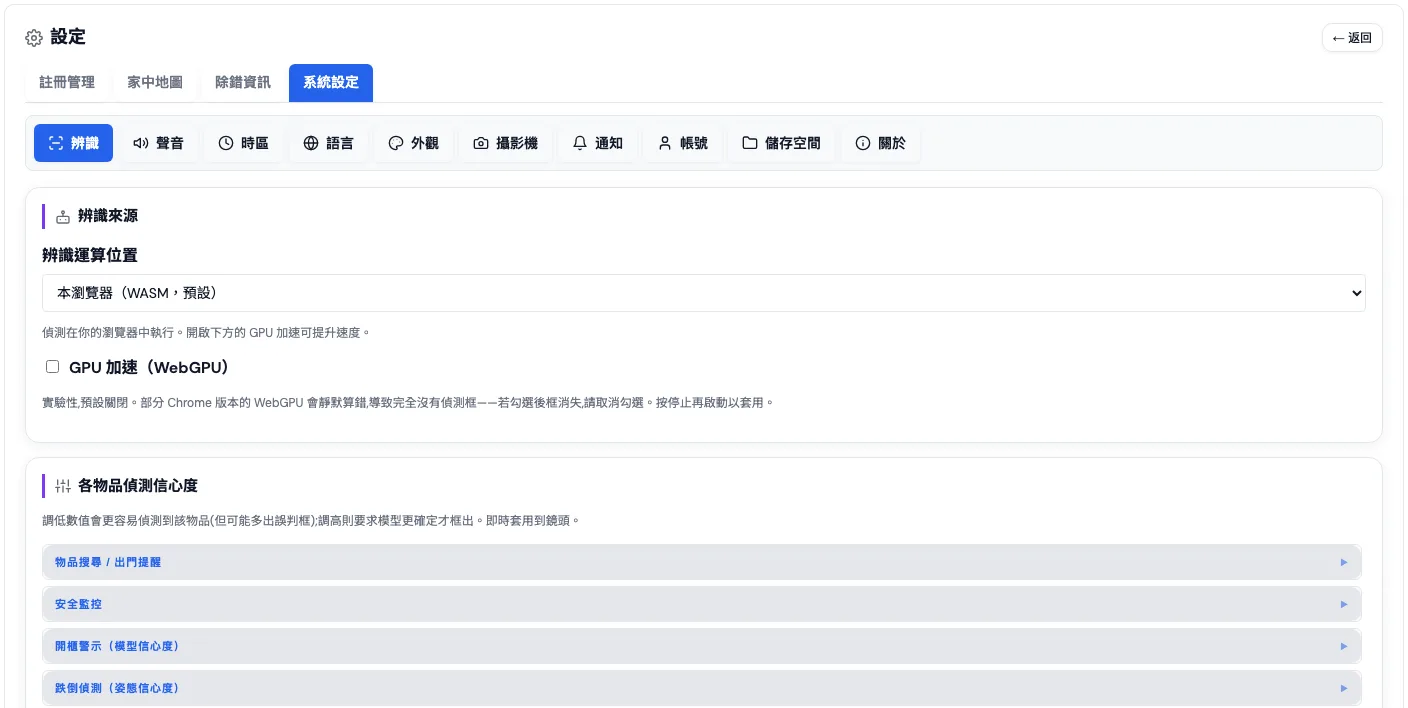
| Detection source | Toggle WebGPU-accelerated recognition (faster when the device supports it) and fine-tune per-item detection confidence. |
|---|---|
| Audio output | Choose which speaker the voice announcements use. |
| Time zone | Set the time zone for clips and records (default Taiwan UTC+8). |
| Language | 繁體中文 / 简体中文 / English / 한국어 / Español / Français / हिन्दी — switches the whole interface instantly. |
| Appearance | Switch between dark and light themes, applied instantly. |
| Cameras | Choose the device source for Camera 1 / Camera 2. |
| Account | Shows the signed-in account and role, and lets you change the password. |
| Storage | Choose the local folder for event clips (videos stay on this device only, never uploaded). |
| About | Shows the current system version. |
10 Phone View
Scan the QR code with your phone to see the same live feed as the console.
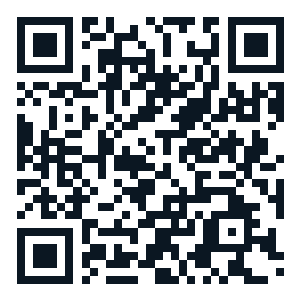
- Click the “ Phone Viewer” button at the top to open the QR window.
- Scan the QR code with your phone camera; on a computer you can also click the QR code to open the viewer site directly.
- Log in with the same account as the console, and your phone shows the live feed; modes and settings sync both ways.
Phone UI — Main screen
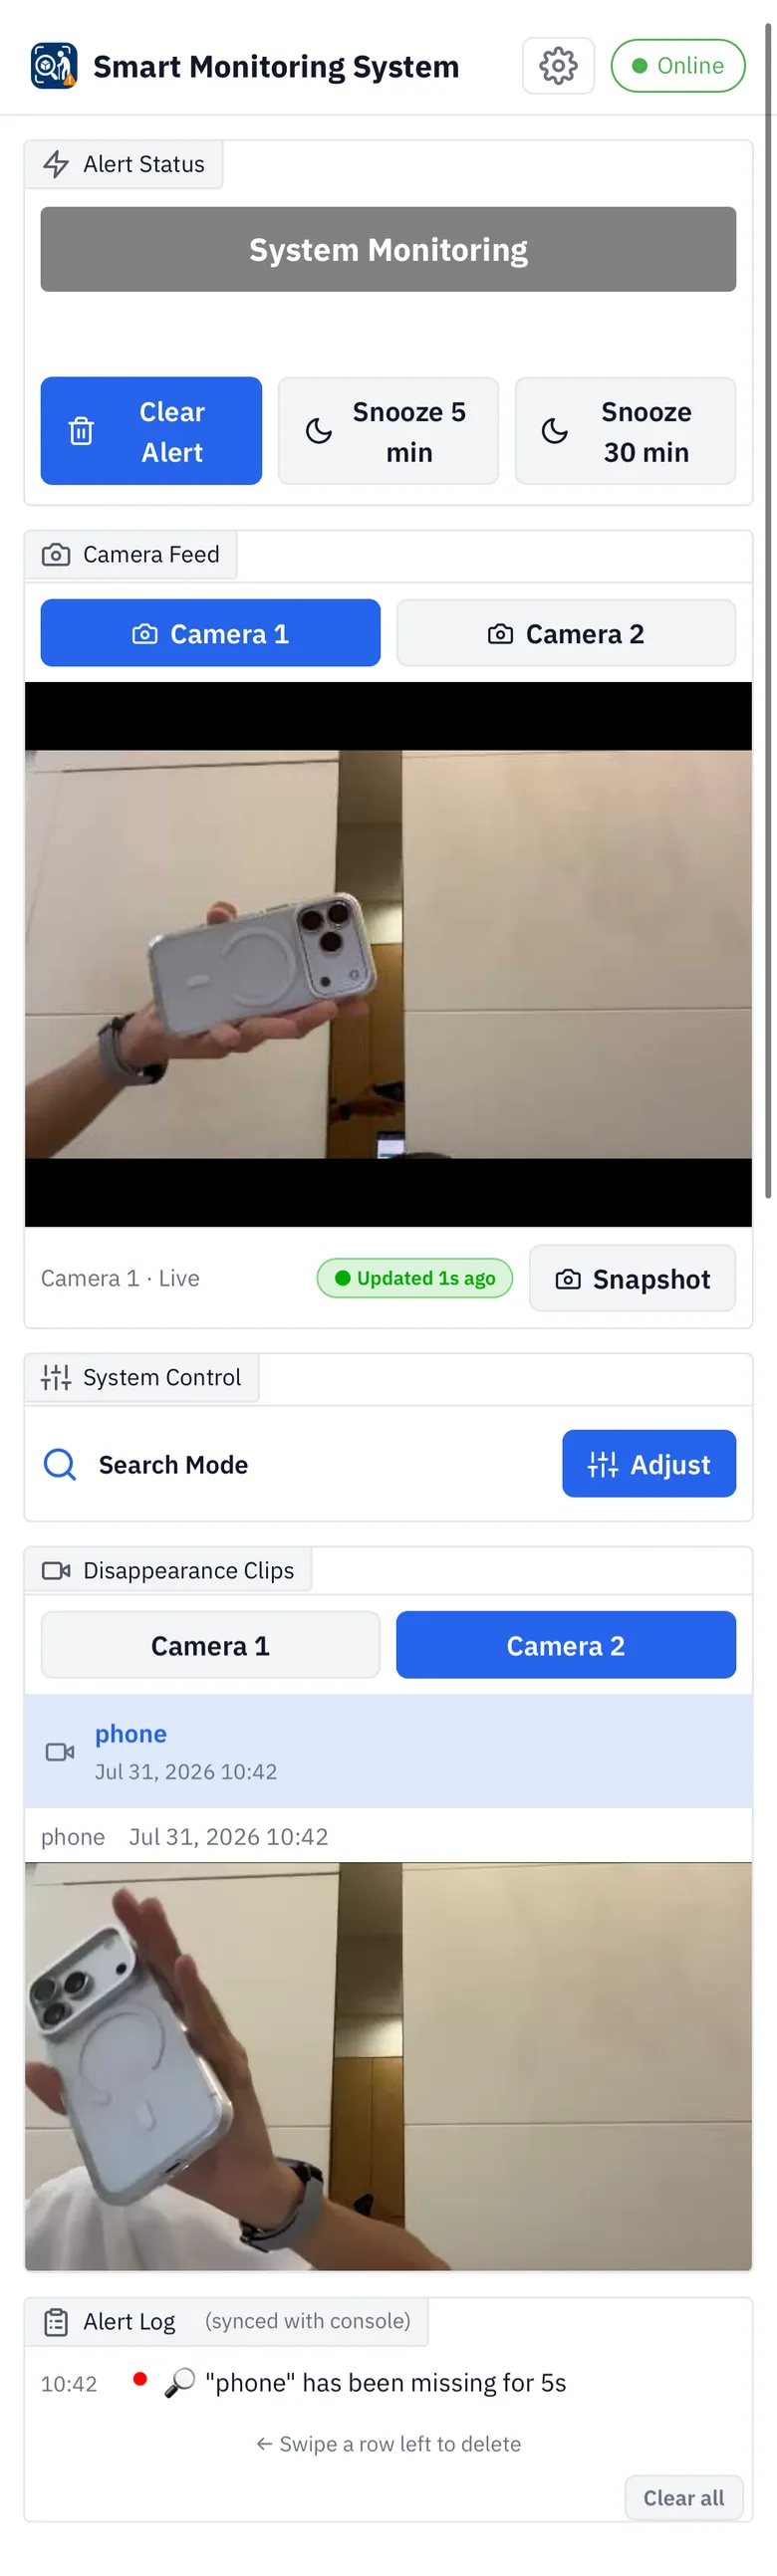
Once connected, the phone shows a compact monitoring UI: alert status with clear/pause buttons on top, the live camera feed in the middle (switch Camera 1/2, take a snapshot), and System Control, “5-seconds-before” clips and the alert log below.
Phone UI — System Control (Adjust)
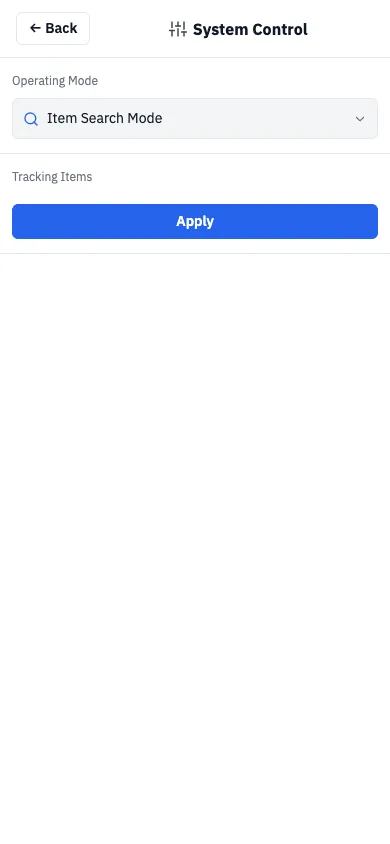
Tap Adjust under “System Control” to switch the operating mode and tick tracked items right from your phone; press “Apply” and it syncs back to the main system at once — no need to walk back to the computer.
Phone UI — Settings
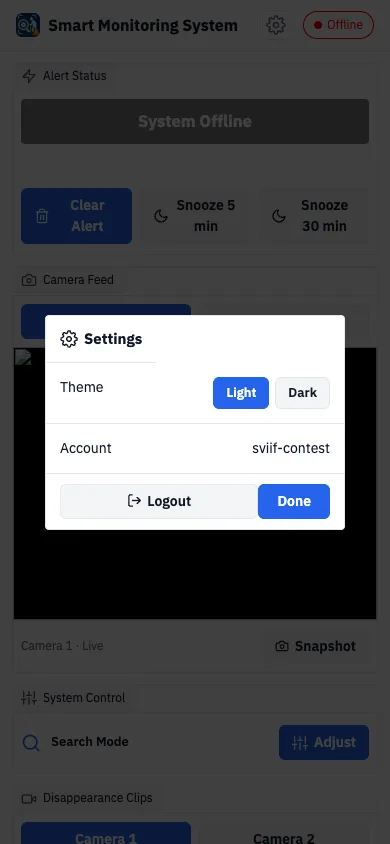
Tap the in the top-right to open settings, where you can switch between dark/light themes, see the signed-in account and log out.
11 Voice Assistant
Wake it by voice and give commands to operate the system hands-free.
Steps
- Press “Smart Assistant” at the top to enter the mode; the status shows “Listening”. Voice capture defaults to the voice-radar hub’s mic — switch to this computer’s microphone under “Settings → Audio”.
- Say the wake word “Smart Assistant” and hear “I’m listening”.
- Then give a command, e.g. “Find my keys”, “Switch to Security Monitor”, “Check the weather”, “Turn off the alert”.
Example commands
| "Find my keys" | Switches to Find Items mode, tracks keys in real time and announces their location. |
|---|---|
| "Switch to Security Monitor" | Switches the operating mode; say any of the five mode names. |
| "Check the weather" | Reports the current city's rain probability and whether to bring an umbrella. |
| "Turn off the alert" | Clears all alerts and silences the alert sound. |
| "What should I take today" | Gives carry recommendations based on your habits and reads them aloud. |
12 Troubleshooting
The problems that actually come up, and how to clear them. Most are browser permissions or cache — not a broken system.
| I pressed Start but the view is still black | The browser asks for camera permission first — choose Allow. If no prompt appeared, click the padlock at the left of the address bar, set Camera to Allow, and reload the page. |
|---|---|
| The camera won’t open, or says it’s in use | One camera cannot be used by two programs at once. Close other video apps — and any other tab running this system — then press Start again. |
| Video works but no detection boxes at all | Go to Settings → System → Detection and untick “GPU acceleration (WebGPU)”, then Stop and Start again. On some Chrome builds WebGPU miscomputes silently, and every box disappears at once. |
| No Telegram notifications arrive | You have to link it first: get the link under Settings → System → Notifications, open it on your phone and send /start in Telegram — it is done when the subscriber count reads 1. Note that Item Search never sends notifications; that is deliberate. |
| The voice assistant doesn’t wake up | Check that microphone permission is allowed. The wake word is “Smart Assistant”; wait for it to answer “I’m listening” before giving the command. In a noisy room, speak closer to the mic. |
| The phone shows no live view | The phone must be signed in with the same account as the console, and the console must be running (the status bar reads “System Monitoring”). The console pushes the video — stop it and the phone goes blank. |
| After switching language some text stays, or the layout breaks | The browser cached an old file. Do one hard reload (Ctrl+Shift+R on Windows, Cmd+Shift+R on Mac). Once is enough. |
| I can’t find the clip that was just recorded | Event clips are saved only to the local folder you chose at sign-in — they are never uploaded. Check the path under Settings → System → Storage; if you pressed “Skip for now”, no folder has been set yet. |
13 Privacy & your data
A surveillance system only earns trust if it is clear about where the data goes. Here is exactly what stays on your machine and what does not.
| Camera frames | Recognition runs inside your browser, on your own device. Frames are never uploaded. You can see where the computation happens under Settings → System → Detection. |
|---|---|
| Event clips | Written only to the local folder you chose at sign-in, and never sent to the cloud. Delete the folder and the clips are gone. |
| Alert log and history | Kept in the browser on the device you are using, separately per account. Clearing your browser data clears them. |
| Account and password | Passwords are stored as a salted PBKDF2-SHA256 hash — the plain password is never kept, so nobody can read it back out of the system. |
| Registered faces and items | These are kept on the server, so the same account recognises the same people from any device. Only your own account can read them, and deleting an entry in Settings → Registration removes it. |
| Telegram notifications | Sent only to the Telegram account you linked yourself. Nothing is broadcast, and you can unlink at any time under Settings → System → Notifications. |